- Free Articles
- Shop
- Workshops
- The Dance Educator Series
- Upcoming Workshops
- Workshop FAQ’s
- Host Application Form
- Student Workshop Application Form
- Dance Teacher & Health Professional Directory
- Workshop Testimonials
- Members Areas
- Cart
- My Account
Adult Crawling
I often talk about the importance of crawling and its effect on a dancer's training later down the track. However, many pre-teens and adults have issues with their knees, ironically often due to a lack of crawling, and work on hands and knees may be uncomfortable for them. Regular crawling may also not be an option if dancers have wrist, shoulder or neck issues.
“Adult Crawling” is a great exercise to help develop connections in the Anterior Oblique and Posterior Oblique slings which normally get developed when babies learn to crawl. It helps activate these slings and the deep stabilisers required for dynamic, spontaneous stability, so it is an ideal exercise to include in a warm up.
This exercise is not only useful for dancers. Test out your whole family and see which level you can each achieve! Do not be in a rush to do the whole sequence. Take your time mastering each level, and especially note your back position and ability to rotate the upper back in each stage. This helps ensure that you do not grip with the outer abdominals, which defeats the whole point of the exercise. Keep breathing normally throughout the entire exercise. If you find yourself holding your breath at any stage, regress to the previous stage.
Level 1 - Cross Body Press
- Set yourself up on a line.
- Place your left foot on the line and lift the right knee up to 90 degrees.
- Place your left hand on the inner surface of the right knee and press firmly.
- You should feel the right inner thigh muscles and the left oblique abdominals working together.
- Make sure your spine is in neutral and the supporting foot is well placed.
- Hold for three breaths, feeling your rib cage expand on each inhale and a gentle pelvic floor connection with each exhale.
- Place your right heel in front of the left big toe on the line, and repeat with the other leg.
- Continue for the length of the room, making sure to hold for 3 slow breaths on each leg.
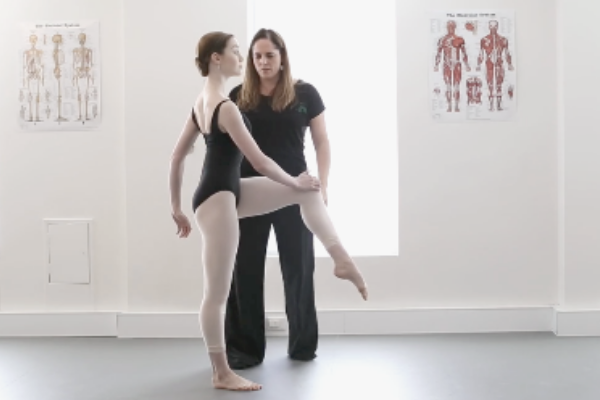
Level 2 - Cross Body Press with Twist
- Set yourself up on a line as for Level 1.
- Float one knee up the front (making sure to not hitch your hip) and press the opposite hand firmly against the inside of the knee.
- Once you have your balance, add in a gentle rotation of the upper body towards the lifted leg.
- Your hips should stay square to the front, and the supporting foot must remain in a good position.
- Keep your eye-line facing forward, while your ribs twist to the side wall.
- Remember to keep the back in neutral while rotating.
- Hold for three natural breaths before replacing the lifted foot and repeating on the other side.
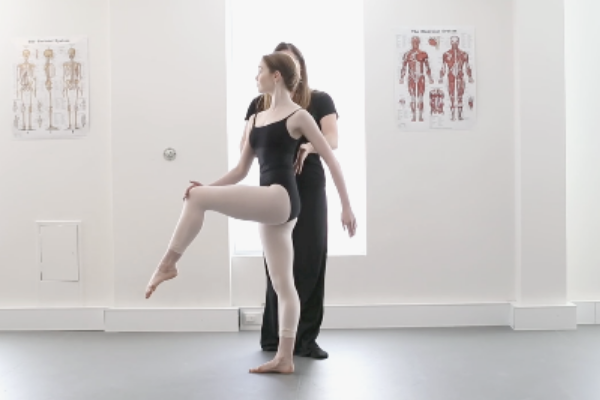
Level 3 - Cross Body Twist with Toe Tap
- Set yourself up on a line as for Level 2.
- Once you have your balance, move from the rotated position to a simple toe tap in parallel en fondu with the hands on the hips.
- Allow the body to lean forward slightly in order to fire the inferior gluteal muscles, and soften the supporting leg, keeping the knee aligned over the second toe.
- Keep both legs in parallel to help target the deepest hip stabilisers.
- Remember to keep the back in neutral, and lengthen from the crown of the head to the tip of the toe.
- There is no weight placed through the back leg.
- Bring the lifted leg back to the rotated twist and hold for three natural breaths before replacing the lifted foot and repeating on the other side.
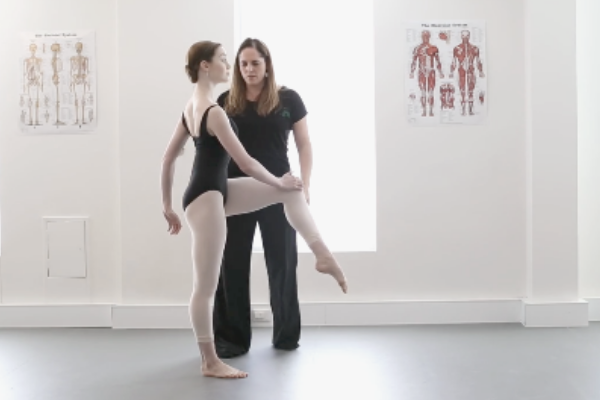
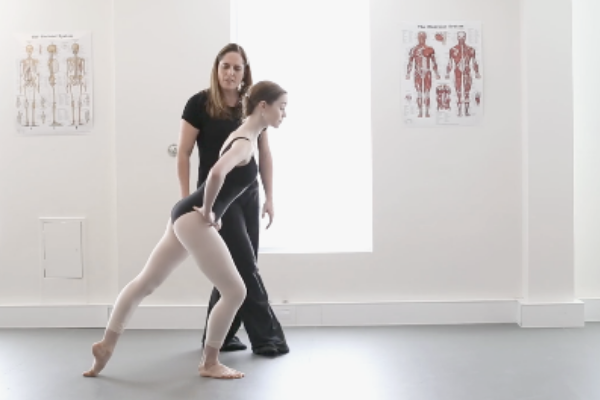
Level 4 - Pedestrian Version
- Set yourself up on a line as for Level 3.
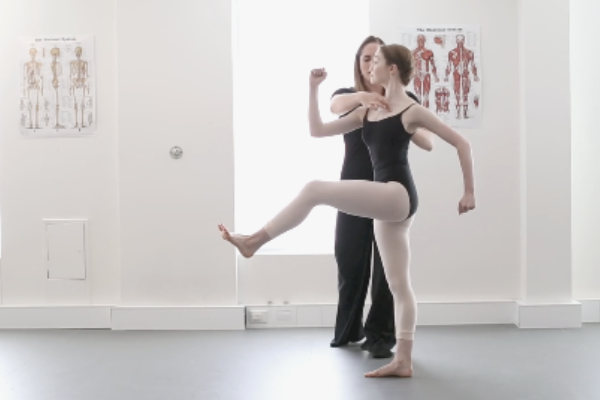
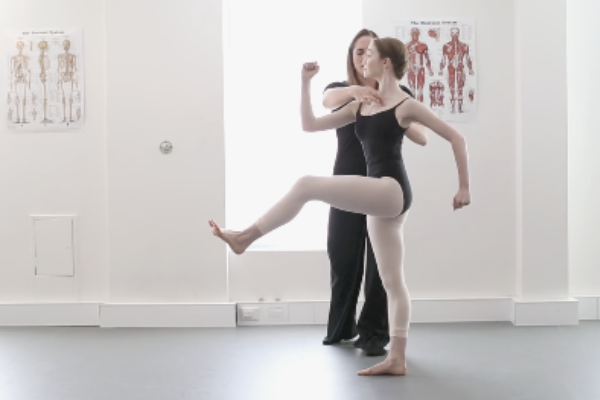
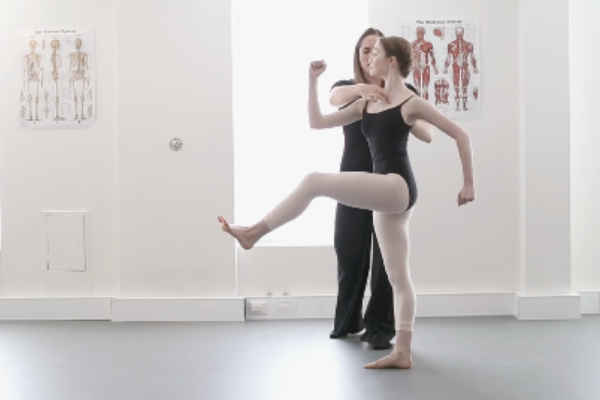
- Step onto the left foot and float the right knee up to 90 degrees in parallel.
- Instead of pressing the hand against the opposite inner thigh, rotate your chest towards the right and bring the left arm up in a running motion to the front.
- Simultaneously drive the right elbow back with the hand pointing to the floor.
- Remember to keep the back in neutral, and focus on using your strength to rotate the rib cage.
- Fondu on the supporting leg as you rotate the rib cage the other way and drive the right hand forward, left elbow back, leaning the body forward slightly.
- Straighten the supporting leg, rotating back to the starting position (upright running-man) before placing the right foot in front of the left and repeating on the other side.
- Continue along the line for the length of the room.
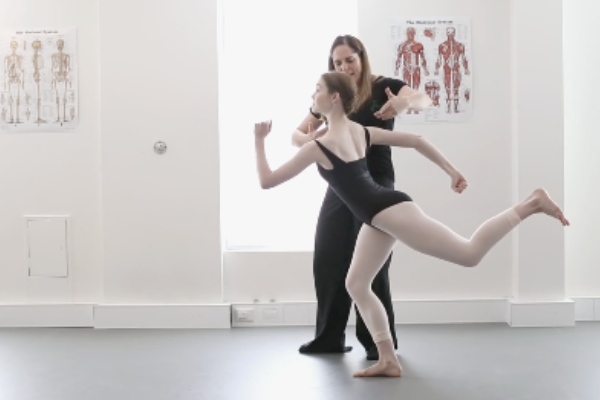
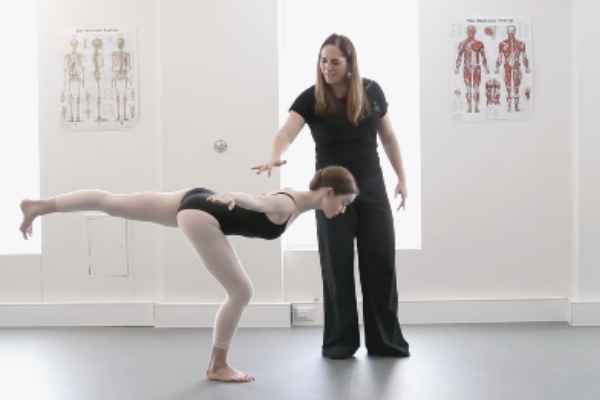
Level 5 - Horizontal 'T'
- Set yourself up on a line as for Level 4.
- Once you have your balance in the upright running-man position, slowly take the lifted leg behind you into a parallel 'T'.
- Make sure to keep the back leg in parallel, toes pointing down towards the floor, and the hips square.
- Unfold your arms to be in line with your body.
- Use the mirror to check that your leg and upper body are both horizontal to the floor.
- Remember to keep the back in neutral, and lengthen from the crown of the head to the heel of the lifted leg.
- Bring the lifted leg back to the twisted upright running-man position and hold for a moment before replacing the lifted foot to the floor and repeating on the other side.
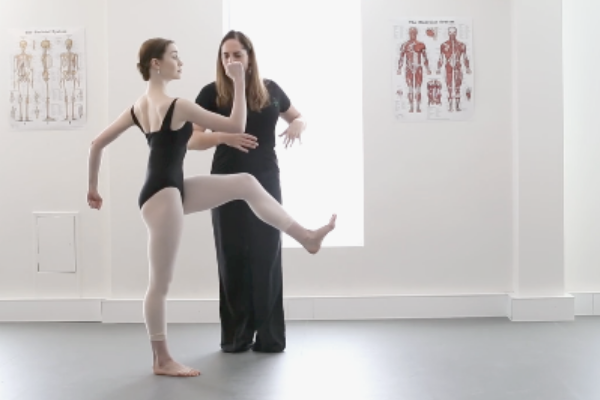
Level 6 - Horizontal T with Rotation
- Set yourself up on a line as for Level 5.
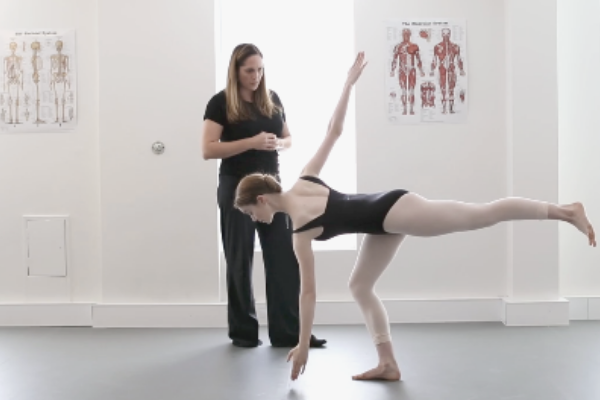
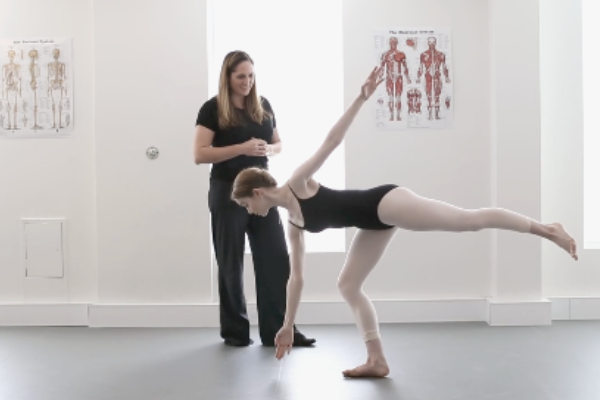
- Once you have your balance in the horizontal T position, slowly rotate the rib cage towards the supporting leg, keeping the arms outstretched.
- Rotate the rib cage away from the supporting leg, keeping the hips facing the floor.
- Rotate towards the supporting leg once more, before recovering to the upright running-man position.
- Hold momentarily before replacing the lifted foot and repeating on the other side.

Level 7 - Horizontal T with Rotation and Rise - Expert Level! (Not included in the video)
- Start as for Level 4 up to the upright running man position.
- Pause, perform a slow rise on your supporting leg to 3/4 height, then slowly lower the heel with control.
- Unfold into the horizontal 'T' then perform a slow 3/4 rise (en fondu).
- With arms outstretched, rotate towards the supporting leg and perform your slow rise (no hand contact with the floor).
- Rotate away from the supporting leg, repeat the slow rise and lower.
- Rotate towards the supporting leg once more and repeat the slow rise and lower.
- Transition back to the upright running-man position and perform one final slow rise and lower on a straight leg before replacing the lifted foot to the floor and repeating on the other side.
- Repeat consistently down the room, as long as you have good form.
Show us your best demonstration of this exercise!
Simply film yourself performing any part of this sequence, post it to Instagram with #adultcrawling, and tag us in @theballetblogofficial
Core Resources
If you are looking to delve deeper into this topic, check out the following programs:
- A New Approach to Core Stability: This program approaches Core Stability training in a completely new way. Using a simple visual chart comprising of 5 different positions (Lying, Side Lying, 4 Point, Sitting and Standing) and 5 different grades, you can work your way through the entire program at your own pace, layering levels of stability to achieve ultimate dynamic control of the spine and pelvis.
- Level One Dance Teacher and Therapist Training: This unique course covers a multitude of assessment and treatment techniques to individualise a dancer's training. With special focuses on Postural Control, Core Stability, Flexibility, Basic Classical Technique, The Dancers Hip, Allegro, Spinal Mobility and Arabesques, it is suitable for anyone working closely with dancers.


